
Introduction to Crispy Chicken Caesar Salad Wraps
There’s something incredibly comforting about a salad wrap, especially when it’s packed with crispy chicken, crunchy veggies, and a tangy dressing. Let me take you back to a memorable summer day that forever changed my culinary landscape. A few summers ago, my family and I decided to host a backyard barbecue, a scene filled with laughter, sunshine, and an abundance of food. As someone who loves to experiment in the kitchen, I found myself in search of a dish that would cater to both adults and kids alike, striking the perfect balance between nutrition and flavor.
It was during this quest that the idea for Crispy Chicken Caesar Salad Wraps took shape. I envisioned a dish that encapsulated all the classic elements of a Caesar salad but with a twist that would make it more portable and fun. The result was a delightful combination of crispy chicken, fresh romaine, and creamy Caesar dressing, all wrapped snugly in a soft tortilla. The wraps were an instant hit, disappearing within minutes as guests reached for seconds, and even thirds. Since that day, they’ve become a staple in my kitchen, ideal for picnics, quick lunches, or even a light dinner.
In this article, I will guide you through everything you need to know to recreate these delicious and satisfying wraps in your own home. From sourcing your ingredients to detailed preparation steps, as well as some handy tips and tricks along the way, we’ll cover all aspects of this delightful recipe. So, let’s embark on this culinary journey together!
Ingredients That Make It All Happen
The beauty of these Crispy Chicken Caesar Salad Wraps lies not only in their flavor but also in their simplicity. The recipe calls for a handful of ingredients that come together to create a satisfying meal. Here’s a breakdown of what you’ll need:
– Chicken Breasts: Start with two large, boneless, skinless chicken breasts. This choice of protein is not only healthy but also cooks up tender and juicy, making it perfect for slicing and wrapping.
– Breadcrumbs: One cup of breadcrumbs is crucial for achieving that delightful crunch. For optimal texture, I recommend using panko breadcrumbs. They create an extra crispy coating when baked, elevating the overall experience of the wrap.
– Parmesan Cheese: Half a cup of grated Parmesan cheese adds a rich, nutty flavor that complements the chicken beautifully. This ingredient is a key player in enhancing the overall taste profile of your wraps.
– Seasonings: A teaspoon each of garlic powder and smoked paprika will enhance the chicken with aromatic flavors. Additionally, don’t forget to season generously with salt and freshly ground black pepper to taste. These seasonings will help to bring out the natural flavors of the chicken.
– Olive Oil: Two tablespoons of extra virgin olive oil serve multiple purposes in this recipe. Not only does it help the breadcrumbs adhere to the chicken, but it also adds moisture and a depth of flavor that is hard to resist.
– Tortillas or Wraps: You’ll need four large flour tortillas. These serve as the perfect vessel for holding all those delicious fillings together, making the wraps easy to handle and eat.
– Romaine Lettuce: Four cups of chopped romaine lettuce provide a fresh, crunchy texture that balances the dish beautifully. The crispness of the lettuce enhances the overall mouthfeel and adds a healthy component to your meal.
– Caesar Dressing: Half a cup of Caesar dressing is the finishing touch that ties everything together with its creamy, tangy flavor. Choose a high-quality dressing for the best results, as it significantly impacts the overall taste of your wraps.
Preparing Your Crispy Chicken
Now that we have our ingredients lined up, it’s time to dive into the preparation process. The first step to creating these Crispy Chicken Caesar Salad Wraps is to prepare the chicken. Begin by preheating your oven to 400°F (200°C). This temperature is ideal for achieving that perfect crispy coating.
1. Prep the Chicken: Start by patting the chicken breasts dry with paper towels. This step is crucial as it helps the breading stick better and ensures a crispier texture.
2. Season the Chicken: In a small bowl, combine the garlic powder, smoked paprika, salt, and pepper. Generously season both sides of the chicken breasts with the spice mixture, ensuring each piece is well-coated.
3. Coat the Chicken: Next, pour the breadcrumbs into a shallow dish. Drizzle the olive oil over the breadcrumbs and mix well to ensure they are evenly coated. This will help achieve that golden-brown crunch you’re aiming for.
4. Bread the Chicken: Take the seasoned chicken breasts and dip them into the breadcrumb mixture, pressing gently to ensure the breadcrumbs adhere well. Make sure each piece is thoroughly coated for that extra crispiness.
5. Bake the Chicken: Place the breaded chicken breasts on a baking sheet lined with parchment paper. Bake in the preheated oven for about 20-25 minutes, or until the chicken is cooked through and the crust is golden brown. You can check for doneness by using a meat thermometer; the internal temperature should reach 165°F (75°C).
6. Let It Rest: Once the chicken is done, remove it from the oven and let it rest for a few minutes. This resting period allows the juices to redistribute, ensuring that your chicken remains tender and juicy when sliced.
As the chicken bakes, you can take this time to prepare the other components of your Crispy Chicken Caesar Salad Wraps. The juxtaposition of the warm, crispy chicken against the cool, crunchy lettuce and creamy dressing is what makes this dish so delightful.
Stay tuned as we continue to build on this recipe, exploring the assembly of the wraps, additional flavor enhancements, and tips for serving and storage!
{{image_2}}
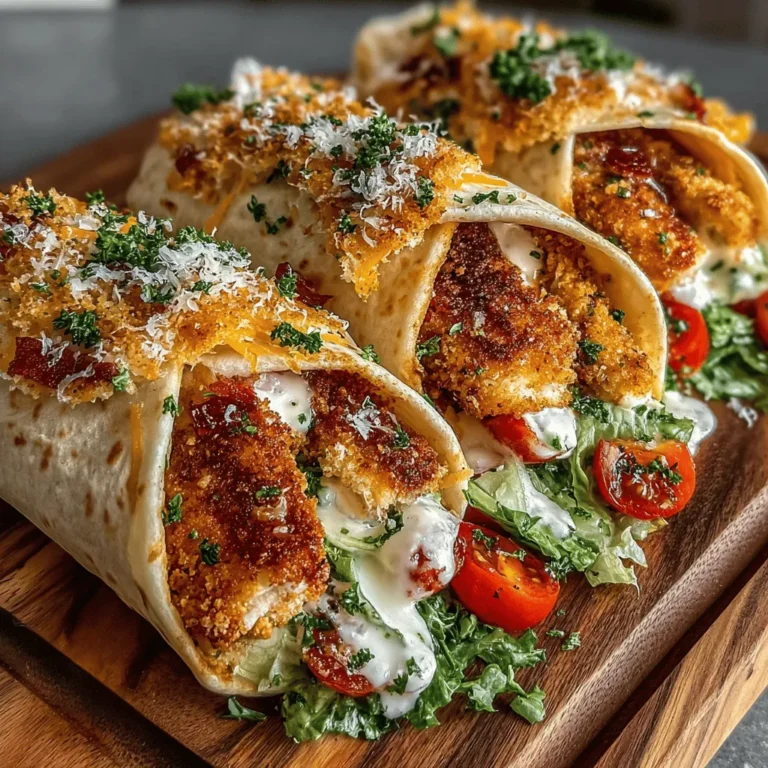
Cherry Tomatoes and Croutons
The addition of cherry tomatoes and croutons to your Crispy Chicken Caesar Salad Wraps is essential for enhancing flavor and texture. A quarter cup of halved cherry tomatoes brings a fresh, juicy burst with each bite, while croutons provide a delightful crunch that complements the creamy Caesar dressing. These elements not only add visual appeal but also elevate the overall taste of your wraps.
Preparing Your Crispy Chicken Caesar Salad Wraps
The preparation of these wraps is straightforward but oh-so-rewarding. Let’s walk through the steps.
Step 1: Preheat the Oven
First, preheat your oven to 400°F (200°C). This ensures that your chicken gets crispy and perfectly cooked.
Step 2: Prepare the Chicken
Pat the chicken breasts dry with paper towels—this step is crucial as it helps the seasonings stick. Season both sides generously with salt, pepper, garlic powder, and smoked paprika. These seasonings will enhance the chicken’s flavor profile and contribute to that irresistible crunch.
Step 3: Coat the Chicken
Next, prepare a shallow bowl with your breadcrumbs combined with grated Parmesan. Drizzle the olive oil over the chicken breasts, then dredge them in the breadcrumb mixture, pressing firmly to ensure they’re well-coated. This is where the magic happens—the breadcrumbs will create a delightful crunch when baked.
Step 4: Bake the Chicken
Arrange the coated chicken on a parchment-lined baking sheet and bake for 20-25 minutes. It’s essential to check that the internal temperature reaches 165°F (75°C) for safe consumption. The aroma wafting through your kitchen will be irresistible!
Step 5: Prepare the Salad
While the chicken bakes, grab a large bowl and toss together the chopped romaine lettuce, Caesar dressing, halved cherry tomatoes, and croutons. Mix everything until the salad is evenly coated. This vibrant mixture is the heart of your wraps.
Step 6: Slice the Chicken
Once the chicken is done, allow it to rest for about five minutes before slicing it into thin strips. This resting period allows the juices to redistribute, ensuring juicy chicken.
Step 7: Assemble the Wraps
Now comes the assembly! Take a tortilla, place a generous portion of the Caesar salad mixture in the center, and top it with crispy chicken strips. Carefully fold in the sides of the tortilla, then roll it up tightly from the bottom. Repeat this process for the remaining tortillas.
Tips & Tricks for Perfect Wraps
Temperature Check
Always use a meat thermometer to ensure your chicken is cooked through. It’s the best way to guarantee juiciness and safety. Undercooked chicken can be unsafe, while overcooked chicken can lead to dryness.
Getting the Crispy Texture
If you want even more crunch, consider broiling the chicken for the last couple of minutes of baking. Just keep a close eye on it to prevent burning. This technique caramelizes the breadcrumbs and gives an extra dimension of flavor.
Customize Your Wrap
Feel free to customize your wraps according to your taste. You can add ingredients like avocado slices, grilled vegetables, or even switch out the protein for shrimp or tofu for a twist on the classic Caesar wrap.
Make-Ahead Option
If you’re in a rush, you can prepare the chicken and salad components ahead of time. Store them separately in the refrigerator and assemble your wraps just before serving. This is a great way to maintain the freshness and crunch of the ingredients.
Serving Suggestions
These Crispy Chicken Caesar Salad Wraps make for a versatile meal option that can be enjoyed in various settings. Here are some serving suggestions to elevate your dining experience:
– Lunch or Dinner: The wraps are hearty enough to serve as a stand-alone meal. Pair them with a side of sweet potato fries or a light vegetable soup for a balanced lunch or dinner.
– Picnic or Potluck: These wraps are perfect for outdoor gatherings. They can be made ahead of time and are easy to transport. Just slice them in half and pack them in a container for an easy, handheld meal.
– Game Day Snack: Whether you’re hosting a game day party or just enjoying a casual evening, these wraps can be cut into smaller pieces and served as finger food. They will surely be a hit among friends and family!
– Accompany with Dips: Consider serving your wraps with a side of extra Caesar dressing, ranch dip, or a tangy balsamic vinaigrette. This adds an extra layer of flavor and allows guests to customize their bites.
Conclusion
Crispy Chicken Caesar Salad Wraps are not just a delightful meal; they are a testament to how simple ingredients can come together to create something truly delicious. With the crunch of the chicken, the freshness of the salad, and the satisfying wrap, this dish is perfect for busy weeknights, lunch on the go, or entertaining guests.
Encouraging your culinary creativity, these wraps can be customized to fit any dietary preference or occasion. Whether you’re sticking to the classic recipe or experimenting with additional flavors, each bite promises to be a delightful experience. So why not gather your ingredients today and give these Crispy Chicken Caesar Salad Wraps a try? Your taste buds will thank you!
