
Indulgent Chocolate Velvet Tarts: A Luxurious Dessert Experience
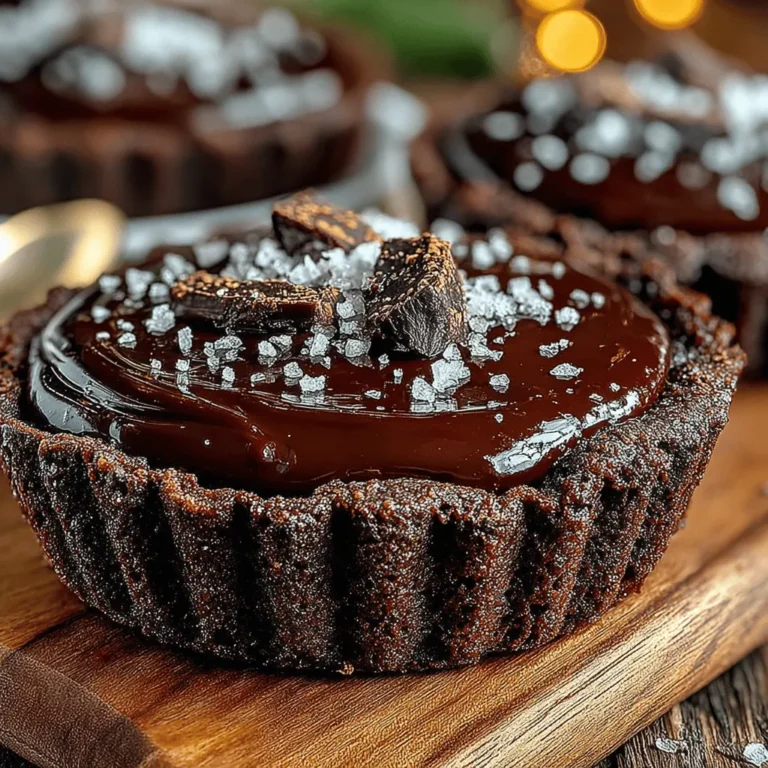
Indulging in a decadent dessert can elevate any occasion, and the Indulgent Chocolate Velvet Tarts are no exception. With their rich ganache filling enveloped in a delicate cocoa-infused crust, these tarts are the epitome of chocolate indulgence. Perfect for gatherings, celebrations, or simply a sweet treat at home, this recipe combines simple ingredients with expert techniques to create a dessert that is not only visually impressive but also incredibly satisfying. In this article, we will explore the intricacies of crafting these delicious tarts, from selecting the finest ingredients to mastering the preparation techniques that yield a perfect result.
Exploring the Ingredients
Understanding the components of your recipe can significantly impact the final product. Here, we delve into each ingredient that makes the Chocolate Velvet Tarts unforgettable.
The Foundation: Tart Crust Ingredients
1. All-Purpose Flour: The base for the tart crust, all-purpose flour provides the necessary structure and texture, ensuring that the crust holds its shape while remaining tender and flaky.
2. Unsweetened Cocoa Powder: This ingredient enhances the chocolate flavor and gives the crust its characteristic dark color. Choosing a high-quality cocoa powder can make a noticeable difference in the depth of flavor.
3. Salt: A pinch of salt elevates the flavors of both the crust and the filling. It balances the sweetness and enhances the overall taste profile of the tarts.
4. Unsalted Butter: Chilled and cubed, unsalted butter is essential for creating a flaky texture when blended with the dry ingredients. The temperature of the butter is crucial; colder butter helps to keep the crust light and flaky.
5. Powdered Sugar: Adds sweetness and contributes to achieving a tender crust. The fine texture of powdered sugar helps it blend smoothly into the dough without creating any graininess.
6. Egg: Serving as a binder, the egg contributes to the richness of the crust and helps to create a cohesive dough that holds together during baking.
The Rich Filling: Ganache Ingredients
1. Heavy Cream: The key component that creates a luscious ganache, heavy cream provides the creamy texture that makes the filling so indulgent.
2. Dark Chocolate: The star of the recipe; the higher the cacao percentage, the richer the flavor. Selecting a high-quality dark chocolate can elevate your tarts to a gourmet level.
3. Vanilla Extract: This ingredient enhances the chocolate flavor, providing a fragrant background note that complements the richness of the ganache.
4. Optional Liqueur: Adding a splash of brandy or coffee liqueur can introduce depth and complexity to the ganache, enhancing the overall flavor profile. This step is entirely optional but can add a unique twist to your dessert.
Step-by-Step Preparation of Chocolate Velvet Tarts
Mastering this recipe involves several critical steps, each contributing to the overall success of the dish. Below, we outline the essential steps to prepare the Indulgent Chocolate Velvet Tarts, starting with the tart crust.
Preparing the Tart Crust
1. Mixing the Dry Ingredients: Begin by sifting together the all-purpose flour, unsweetened cocoa powder, and salt in a mixing bowl. This step ensures an even distribution of flavors and removes any lumps from the cocoa powder, which can affect the texture of your crust.
2. Incorporating the Butter: Cold, cubed unsalted butter is added to the bowl of dry ingredients. Using a pastry cutter or your fingers, work the butter into the flour mixture until it resembles coarse crumbs. This process is crucial for achieving a flaky texture; be careful not to overwork the dough, as this can lead to a tough crust. The goal is to have visible bits of butter throughout the mixture, as these will create the flakiness as the crust bakes.
3. Adding the Sugar and Egg: Once the butter is incorporated, add the powdered sugar and mix until combined. Next, create a well in the center of the mixture and crack in the egg. Use a fork to beat the egg lightly before gradually incorporating it into the dry ingredients. This technique helps bind the dough together while maintaining a tender texture.
4. Forming the Dough: As the ingredients come together, use your hands to gently knead the dough until it forms a cohesive ball. If the dough feels too dry, you can add a teaspoon of cold water, one at a time, until the desired consistency is achieved. Be cautious not to overwork the dough, as this can lead to a dense crust.
5. Chilling the Dough: Once your dough is formed, flatten it into a disc and wrap it in plastic wrap. Refrigerate for at least 30 minutes. Chilling the dough is essential as it helps the butter solidify, which will contribute to the crust’s flaky texture when baked.
As you prepare the tart crust, the anticipation of the rich chocolate ganache filling begins to build. In the next section, we will delve into the process of creating the velvety ganache that will fill these delightful tarts. Stay tuned as we continue to explore this luxurious dessert experience, guiding you through every step to ensure your Indulgent Chocolate Velvet Tarts are nothing short of spectacular.
Binding with Egg: Understanding How to Mix Just Until the Dough Comes Together
When creating a tart crust, knowing how to bind the ingredients is crucial for achieving the perfect texture. The key here is to mix until the dough just comes together. This means that you should add the beaten egg gradually and mix gently with your fingertips or a fork until the dough forms a cohesive mass. Avoid overworking the dough; doing so can develop the gluten in the flour, resulting in a tough crust rather than a tender, flaky one. Remember, the goal is to create a smooth and pliable dough that holds together well without being overly worked.
Chilling the Dough
Importance of Chilling
Chilling the dough is a vital step in the tart-making process. Once your dough is mixed, wrap it in plastic wrap and refrigerate it for at least 30 minutes. This resting period allows the gluten to relax, which prevents shrinkage during baking and contributes to a tender texture. Additionally, chilling the dough firms it up, making it easier to roll out and shape without tearing. This step is often overlooked, but it is essential for achieving that flaky, melt-in-your-mouth crust.
Rolling and Forming the Tart Shells
Techniques for Rolling
Once the dough has chilled, it’s time to roll it out. Dust your work surface lightly with flour, and place the dough in the center. Using a rolling pin, roll from the center outward, turning the dough occasionally to maintain an even thickness. Aim for about 1/8-inch thickness. If the dough starts to stick, sprinkle a bit more flour on the surface and the dough. Be gentle to avoid tearing; if it cracks, simply patch it up with your fingers.
Transferring the Dough
After rolling out the dough, you need to transfer it to the tart pan without causing any damage. One effective method is to roll the dough onto the rolling pin, then carefully unroll it over the tart pan. Gently press the dough into the corners and sides of the pan to ensure a snug fit. Trim any excess dough hanging over the edges. Alternatively, you can use a sharp knife to cut the dough into manageable squares and carefully place each piece into the pan.
Pricking the Crust
Before baking, it’s crucial to prick the crust with a fork. This technique, known as docking, creates small holes that allow steam to escape during baking. Without pricking, the crust may puff up and form bubbles, leading to an uneven surface. Be sure to prick the bottom and sides thoroughly to prevent unwanted air pockets.
Blind Baking the Crust
The Blind Baking Process
Blind baking is the technique used to pre-bake the tart crust before adding the filling. Preheat your oven to 375°F (190°C). Line the crust with parchment paper, letting it hang over the edges, and fill it with pie weights, dried beans, or rice. This weight keeps the crust from puffing up as it bakes. Place the tart in the preheated oven and bake for about 15 minutes. After that, carefully remove the parchment and weights, and return the crust to the oven for an additional 5-10 minutes until it is lightly golden.
Identifying Doneness
A perfectly baked tart crust should be lightly golden brown and firm to the touch. You can check for doneness by gently pressing the edges; they should feel hard and not doughy. If the crust is pale or soft, it needs a bit more time in the oven. Keep an eye on it to prevent over-baking, which can lead to a bitter flavor.
Crafting the Ganache Filling
Heating the Cream
The ganache filling is where the indulgence of these tarts truly shines. Begin by heating your heavy cream in a small saucepan over medium heat. Watch closely, as you want to bring the cream just to a simmer, not boil it. Boiling can alter the texture and flavor of the ganache. As soon as you see bubbles forming around the edges, remove the pan from the heat.
Melting the Chocolate
While the cream is heating, chop your chocolate into small pieces and place it in a heatproof bowl. Once the cream is ready, pour it over the chopped chocolate and let it sit for a few minutes. This resting period allows the chocolate to soften and melt without being disturbed. After a few minutes, gently stir the mixture with a spatula until it becomes silky and smooth. This step is crucial; if you stir too soon, the chocolate may seize, resulting in a grainy texture.
Flavor Enhancements
For those looking to elevate the flavor of their ganache, consider adding a splash of liqueur, such as coffee or orange liqueur. This addition can enhance the richness of the chocolate and provide a delightful complexity to the flavor profile. Start with a small amount (1-2 tablespoons) and adjust according to your taste preferences. Remember to stir it in just before pouring the ganache into the tart shells.
Filling and Chilling the Tarts
Pouring the Ganache
Once your ganache is ready, it’s time to fill the tart shells. Carefully pour the ganache into each shell, filling them to the top. To avoid creating air bubbles, pour slowly and steadily. If bubbles do form, use a toothpick or a small skewer to gently pop them. This ensures a smooth and glossy finish once your tarts are set.
Setting the Tarts
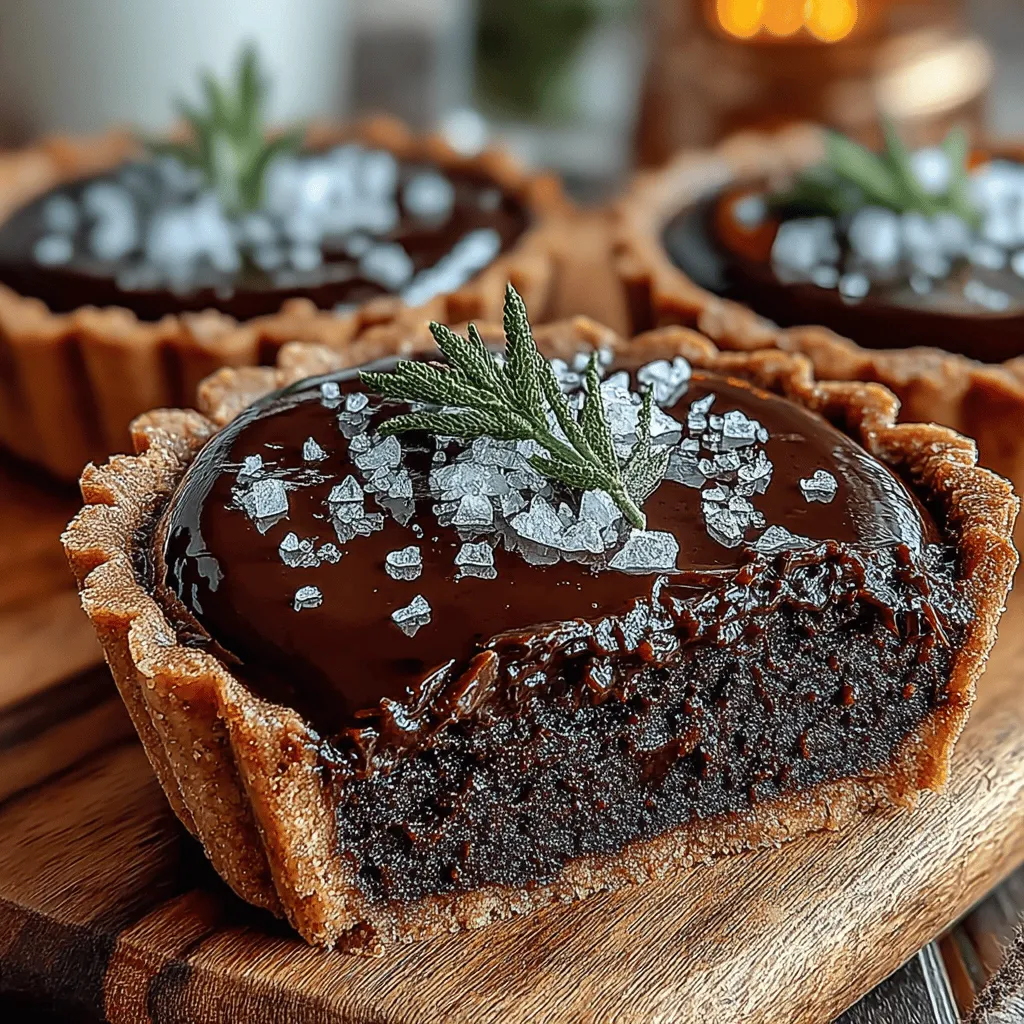
After filling, allow the tarts to cool at room temperature for about 10-15 minutes. Then, transfer them to the refrigerator to chill for at least 2 hours. This chilling time is essential for achieving the perfect texture—each bite should be rich and velvety, allowing the chocolate to melt in your mouth.
Garnishing and Serving
Finishing Touches
Once the tarts are chilled and set, it’s time to add the finishing touches. Consider garnishing with fresh raspberries or strawberries, as their tartness beautifully complements the rich chocolate. A sprinkle of sea salt can enhance the chocolate flavor, while a dusting of powdered sugar adds a touch of elegance. For an extra indulgent touch, you could also top with whipped cream or chocolate shavings.
Serving Suggestions
These indulgent chocolate velvet tarts pair wonderfully with a variety of accompaniments. A scoop of vanilla ice cream or a dollop of whipped cream provides a delightful contrast to the dense chocolate filling. For beverage pairings, consider serving with a glass of dessert wine, espresso, or a rich cup of coffee to round out the experience. Each bite of the tart, paired with these complements, will elevate your dessert to a whole new level of indulgence.
Conclusion
The Indulgent Chocolate Velvet Tarts are a testament to the beauty of simple ingredients and thoughtful preparation. By understanding each component and mastering the preparation steps, you can create a dessert that not only pleases the palate but also impresses guests and family alike. This recipe invites you to indulge in the rich, velvety goodness of chocolate while enjoying the satisfaction of crafting a delightful tart from scratch. Whether it’s a special occasion or a cozy night in, these tarts are sure to satisfy your chocolate cravings and leave a lasting impression. Enjoy creating and sharing these delicious treats—they are bound to become a favorite in your dessert repertoire.
